When Your Nails Need to Travel as Much as You Do
Okay, confession time. Last year, I went to Santorini for my sister’s wedding. Gorgeous white buildings, blue domes, that incredible light – you know the drill. I spent weeks planning outfits, bought three different sun hats (don’t judge), and packed my favorite camera. But when I looked at my photos afterward? All I could see were my sad, bare nails. In every single shot. They looked like little pale ghosts floating at the edges of my champagne glass, my hand on the balcony railing, my gesture pointing toward the sunset. Honestly, it ruined some otherwise perfect frames.
That’s when it hit me: nails are accessories in travel photography. They’re in 80% of your shots whether you realize it or not – holding a coffee in a Parisian café, gesturing toward a mountain range, resting on a tropical beach towel. And if you’re like me and can’t be bothered with salon appointments while juggling flights, itineraries, and a toddler who thinks passports are chew toys, press-ons are your secret weapon.
What Actually Works on Camera (And What Doesn’t)
Let’s get real for a second. What looks amazing in your bathroom lighting might completely disappear or, worse, glare horribly in bright sunlight. I’ve learned this through trial and many, many errors. That super sparkly glitter set I loved? Turned into blinding white spots in my beach photos. The nude shade that looked “so natural” in the store? Vanished completely against my skin tone in shadowy temple shots.
Here’s what I’ve found actually works:
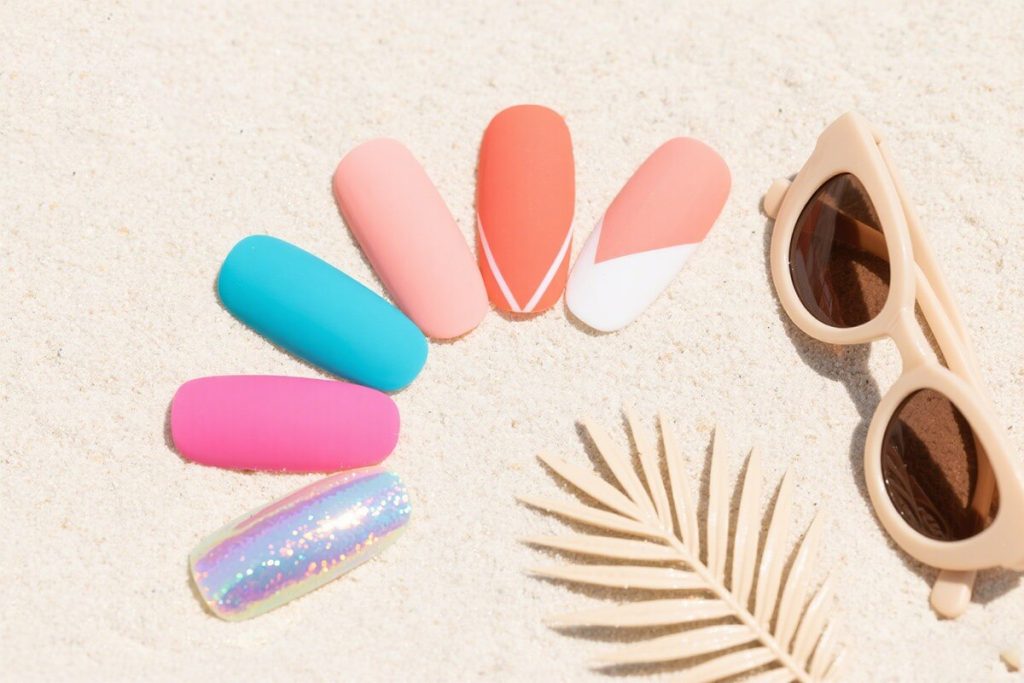
Matte finishes are your best friend for sunny destinations. No glare, no weird reflections, just pure color. Eleglara’s matte collection – especially their Desert Bloom set – has this velvety look that photographs beautifully against bright backgrounds. Weirdly, they also seem to make colors look more saturated on camera. Don’t ask me why, it just works.
Medium-length shapes – think almond or oval – are the most versatile. Too short and they don’t register in wide shots; too long and they start looking costume-y in casual travel moments. The 24 pieces in Eleglara boxes are perfect because you can mix and match lengths. I usually go slightly shorter on my pinkies and ring fingers for a more natural look.
Color Theory for Different Backdrops
This is where it gets fun. Choosing nail colors for travel isn’t just about what you like – it’s about creating contrast and harmony with your environment.
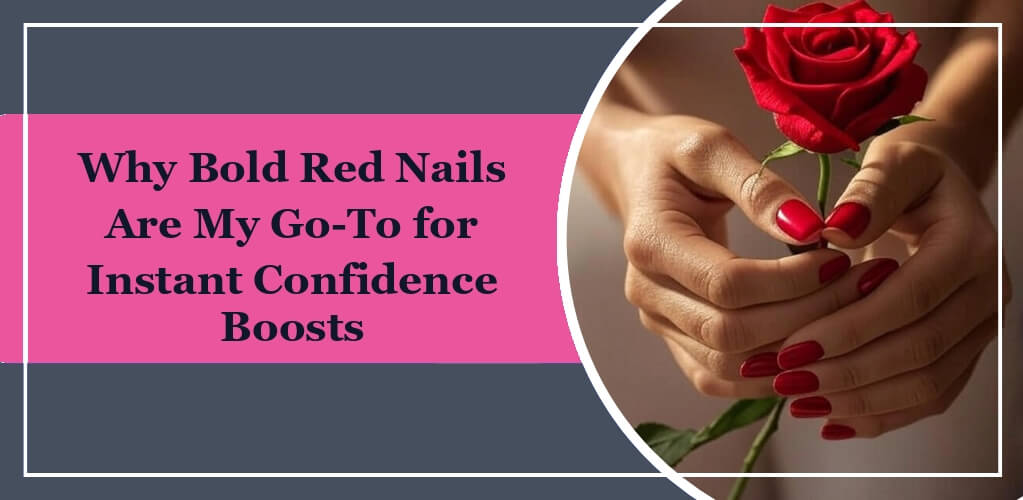
For urban destinations (cities, architecture): Go for bold, clean colors. That bright red holding a black coffee cup against gray cobblestones? Perfection. Eleglara’s Cherry Pop has this blue-based red that doesn’t turn orange in photos – a common problem with cheaper press-ons. I wore these in New York last fall and they popped against every concrete and glass background.
For natural settings (beaches, mountains, forests): Earth tones with a twist. Not boring browns, but terracottas, sage greens, or deep blues. Their Ocean Depth set has this jelly gel finish that catches light without glaring – perfect for water shots. I wore them in Hawaii and they looked like little pieces of the ocean on my hands.
For cultural/historical sites: Sometimes subtle is better. I made the mistake of wearing neon pink to the Vatican Museums once – my nails became the focal point in every Sistine Chapel photo. Now I opt for muted metallics or French tips that frame without distracting. The Pearl Sheen set has this soft luminosity that works beautifully in dim museum lighting.
The Practical Stuff: Making Them Last Through Adventures
Because let’s be honest – travel isn’t gentle on nails. Between sunscreen application, luggage handling, and that impulsive decision to learn rock climbing on day three, your press-ons need to survive.
First: application timing. I always put mine on the night before a big photo day. Not right before, because they need time to really set. And not days before, because life happens. That sweet spot of 8-12 hours of no heavy hand use (sleep counts!) makes all the difference.
Second: bring backups. I pack 2-3 sets in my carry-on. Not because I expect them all to fail, but because moods change! Maybe I planned for beach photos but we end up at a fancy dinner instead. Having options matters. Eleglara’s slim boxes are travel-friendly – they take up less space than a paperback.
Third: the emergency kit. In my toiletry bag: nail glue (the tiny Eleglara one), a mini file, and cuticle oil. That’s it. If one nail has a moment, I can fix it in a bathroom stall between sights. True story: I once reattached a nail in a Tokyo subway station bathroom while my husband held our sleeping kid. Glamorous? No. Effective? Absolutely.
My Favorite Travel Nail Moments
I want to share two experiences that perfectly illustrate why this matters.
In Morocco, I wore the Marrakech Nights set – deep blues with gold flecks. We were shooting in the markets, all those vibrant textiles and pottery. In every photo, my hands looked intentional, like part of the composition rather than an afterthought. The guide actually complimented my nails, saying they matched the traditional tile work. That never happens with bare nails!
Then there was the opposite lesson: skiing in Colorado. I thought, “It’s cold, I’ll be wearing gloves, who cares?” But then came the lodge photos, the hot chocolate shots, the fireplace selfies. My naked nails looked… unfinished. Like I’d forgotten part of my outfit. Now I always pack at least a neutral set, even for “nails won’t show” trips. Because they always show eventually.
For the Camera-Shy Travelers
Maybe you’re not posing for Instagram, but you still want to look put-together in casual travel photos. Here’s my advice: start with French tips or a translucent jelly. Eleglara’s Glass Slipper set looks like you just got a professional manicure, but it’s subtle enough that it won’t feel “loud” if you’re not used to nail art. They photograph beautifully because that clean white tip creates definition without being distracting.
Another trick: match your nails to your most-worn accessory. If you always travel with a specific scarf or hat, pick up one of the colors. It creates cohesion in your photos without requiring much thought. I have this navy blue sweater that goes everywhere with me, so I often pack coordinating nails. Makes me look way more pulled together than I actually am at 6 AM flights.
The Bottom Line
Travel photography is about capturing moments, memories, feelings. And every detail contributes – including your hands. Press-on nails give you that polished look without the salon commitment, and with the right choices, they can actually enhance your photos rather than distract from them.
My personal go-to lately? Eleglara’s Sunrise Symphony set. It has these gradient oranges and pinks that work with sunrise beach shots, sunset mountain views, and everything in between. The jelly gel formula is VOC-free (important when you’re pregnant like I was last trip!), and they survived everything from snorkeling to fancy dinners.
At the end of the day, it’s about feeling confident in your photos. When you look back at those travel memories years from now, you won’t be thinking “I wish I’d done my nails” – you’ll just see yourself, happy and complete, in beautiful places. And honestly? That’s worth packing a few extra grams in your carry-on.