The Secret Most Salons Don’t Want You to Know
Okay, confession time. Last month I dropped $85 on a gorgeous gel manicure at this fancy downtown salon. The artist was amazing, the ambiance was perfect, and my nails looked… incredible. For about three days. Then I was unloading the dishwasher and BAM – major chip on my thumb. I almost cried. Honestly, the disappointment hit harder than my toddler’s morning wake-up calls.
Here’s the thing I’ve learned after years in this industry: expensive doesn’t always mean better. Some of the most stunning nail looks I’ve ever rocked came from press-ons that cost less than my weekly coffee budget. And no, I’m not talking about those thick, plasticky ones from the drugstore that scream “I tried to save money and failed.” I mean the good stuff – the ones that make people stop you in Target to ask where you got your nails done.
What Actually Makes Nails Look “Premium”
Let’s get real about what we’re chasing here. Premium-looking nails aren’t about the price tag – they’re about three things: shape, finish, and fit. Get these right, and nobody will ever guess you didn’t just walk out of a high-end salon.
The shape thing is huge. I can’t tell you how many budget press-ons I’ve tried that have weird, bulky sidewalls or awkward curves. It’s like they were designed by someone who’s never actually seen human fingers. The good ones? They have that natural apex curve and tapered sides that just… work. Weird, I know, but when you find them, you’ll know exactly what I mean.
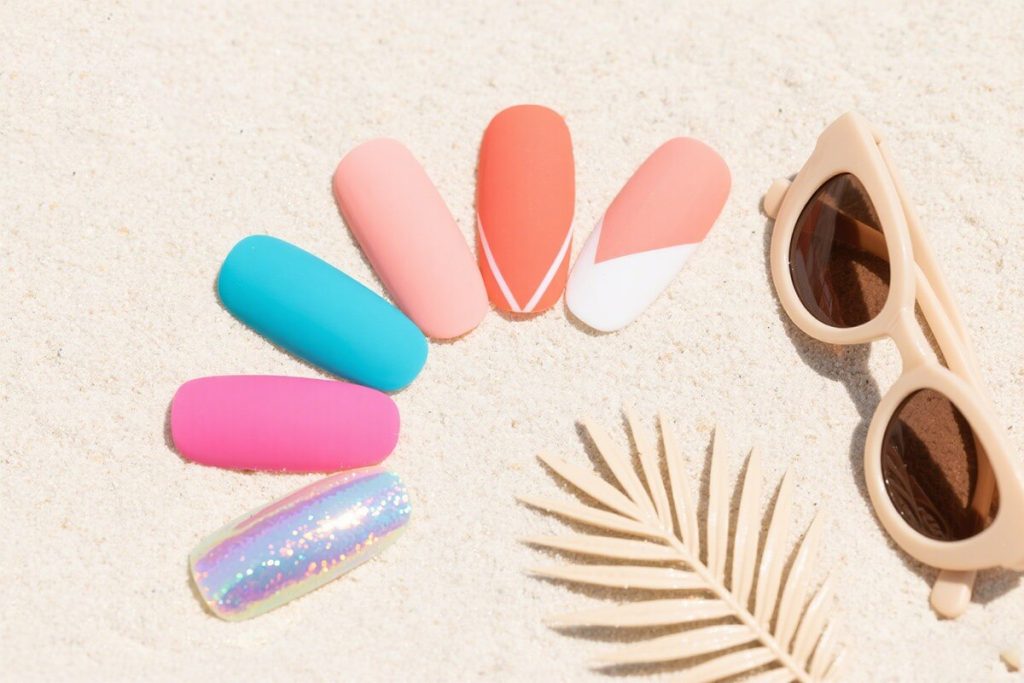
And the finish! Matte versus glossy, jelly versus solid – it matters more than you’d think. Some of the eleglara sets I’ve been loving lately have this incredible Jelly Gel formula that catches the light in the most luxurious way. It’s not that flat, plastic-y shine that cheaper sets have. It’s dimensional. It has depth. It makes your hands look expensive.
My Go-To Budget Finds That Look Anything But Cheap
Alright, let’s get into the good stuff. Over the years, I’ve developed what my husband calls my “nail radar” – I can spot quality press-ons from across the room. Here are my current favorites that consistently deliver that premium look without the premium price.
First up – the short square sets. Don’t ask me why, but something about a clean, short square nail just screams “I have my life together.” I’ve been reaching for eleglara’s shorter sets lately because the fit is just… chef’s kiss. They come with 24 pieces per box, which means you’re almost guaranteed to find your perfect size. No more trying to make that slightly-too-big nail work and ending up with that awkward gap at the cuticle.
Then there are the nudes and neutrals. I know, I know – they sound boring. But hear me out. A perfectly executed nude almond or oval nail? That’s luxury. It’s understated. It’s the beauty equivalent of a perfectly tailored black dress. The trick is finding nudes that actually match your skin tone instead of that weird orangey-beige that some brands think works for everyone.
The Application Game-Changer Nobody Talks About
Here’s where I see most people go wrong with budget press-ons. They slap them on with the included adhesive tabs and call it a day. Honey, no. That’s like buying a gorgeous dress and wearing it with the tags still on.
My secret weapon? Prep, prep, and more prep. I buff my natural nails just enough to create some texture (but not so much that I damage them), wipe with alcohol, and then – this is crucial – I push back my cuticles. It makes such a difference in how seamless the application looks. Suddenly your $15 press-ons look like they cost $75.
And can we talk about glue for a second? The glue that comes with most budget sets is… fine. But if you really want that salon-quality hold, invest in a good nail glue. I’m not talking about spending a fortune – even the $5-8 ones from beauty supply stores are miles better. They dry clearer, hold stronger, and don’t leave those white residue marks that scream “press-ons!”
Styling Tricks That Elevate Everything
This is where the magic really happens. You can take the most basic budget press-ons and make them look custom with a few simple styling tricks.
First – mix and match. Who says you have to wear the same design on every finger? I love taking a solid color set and adding one or two accent nails from a different design. It looks intentional, fashion-forward, and completely custom. Last week I paired a simple nude set with two glitter accent nails from an old eleglara holiday collection I had lying around. My mom asked if I’d gotten them done at that fancy place in the city. Score.
Second – file and shape to your preference. Most press-ons come with a specific shape, but guess what? You can change it! I often take square tips and gently file them into soft squares or even ovals. It makes them look more natural and less “out of the box.” Just go slow and use a fine-grit file – you don’t want to rough up that beautiful finish.
When Budget Actually Beats Premium
Here’s the part that might surprise you. There are actually situations where budget press-ons are better than salon nails. I know, blasphemy coming from someone who’s spent years in beauty.
Take pregnancy, for example. When I was pregnant with my daughter, I became super sensitive to smells. The chemical smell in most nail salons made me nauseous. But eleglara’s VOC-free formulas? Game changer. I could do my nails at home without worrying about fumes, and I still got that gorgeous, polished look for baby showers and maternity photos.
Or what about when you’re traveling? I recently went to visit my sister across the country and didn’t want to waste vacation time sitting in a salon. I packed three different eleglara sets in my carry-on and did my nails while watching movies on the plane. By the time we landed, I had fresh, perfect nails ready for all our adventures. Try doing that with gel manicures.
The Mental Shift: Embracing the Press-On Life
I think the biggest hurdle for most people isn’t the quality of budget press-ons – it’s the mindset. There’s still this weird stigma that press-ons are “cheap” or “tacky.” Let me tell you something: some of the most fashion-forward people I know in the industry regularly rock press-ons.
It’s not about being cheap – it’s about being smart. Why spend $60-100 every two weeks on salon nails when you can achieve a similar look for a fraction of the price? That money could go toward… well, literally anything else. A nice dinner out. A couple of books. Saving for that vacation you’ve been dreaming about.
And the variety! With press-ons, you can change your entire look in 15 minutes. Feeling edgy? Go for a dark, moody color. Feeling feminine? Switch to something soft and glittery. Want to try that trendy chrome look without committing? There’s a press-on for that. The freedom is honestly addictive.
My Final Piece of Advice
If you take nothing else from this, remember this: the best budget press-ons are the ones that make you feel amazing when you wear them. It doesn’t matter if they cost $5 or $50 – if they boost your confidence and make you feel put-together, they’re worth it.
Start with one set that speaks to you. Maybe it’s a classic French tip, or a bold red, or something with a little sparkle. Take your time with the application, use my prep tips, and see how you feel. I bet you’ll be surprised at how premium they look – and how many compliments you get.
And if anyone asks where you got them done? You can totally tell them it’s your little secret. Or send them my way – I’m always happy to convert another press-on believer.